


Power Automate can create a SharePoint site end-to-end via the SPSiteManager/Create REST endpoint, no PowerShell, no admin center click-through. Useful for project sites, department portals, or onboarding sites that get created the same way every time.
In this post: Prerequisites · The flow structure · Step-by-step walkthrough · Testing the flow · Checking before you create · Associating the new site with a hub · Best practices · When would you actually use this? · Related reading
Prerequisites
- Access to Power Automate, and permissions to actually create SharePoint sites (site creation isn’t automatically open to every licensed user. Check your tenant’s site creation policy if the flow fails with a permissions error).
- Knowledge of which SharePoint template you want:
STS#3for a Team Site not connected to a Microsoft 365 Group,SITEPAGEPUBLISHING#0for a Communication Site. - The parameters each new site needs: name, description, and owner email, at minimum.
The flow structure
Three parts: a trigger (manual, or event-based if you want this kicked off by something else), variables to hold the site name/description/owner, and an action that sends the actual creation request to SharePoint.
Step-by-step walkthrough
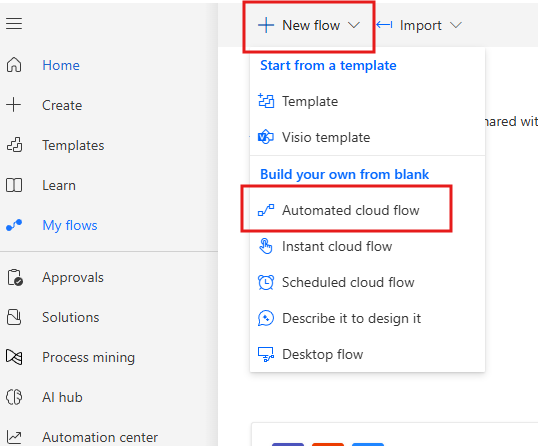
Create a new flow:
Add the Manually trigger a flow trigger:
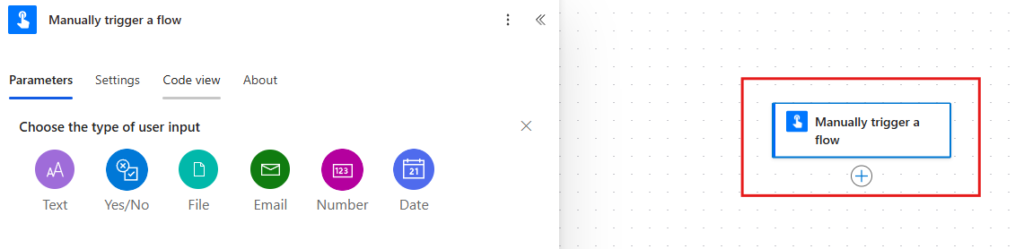
Add input fields to the trigger for SiteName, SiteDescription, and OwnerEmail. This is what lets whoever runs the flow supply these per site, instead of hardcoding one site’s details into the flow itself:

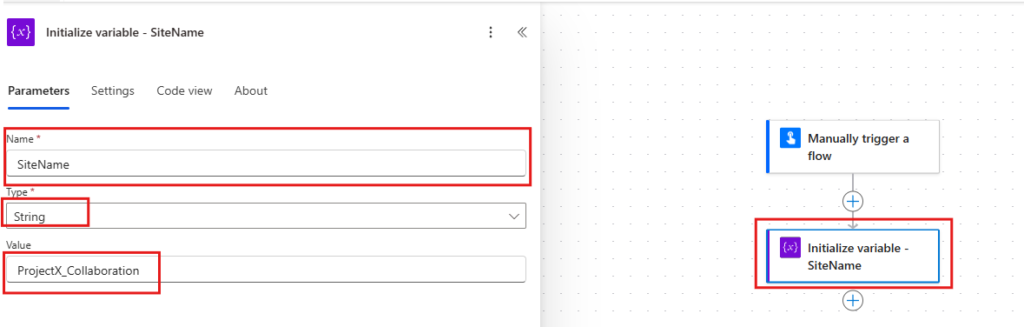
Add Initialize variable actions for SiteName, SiteDescription, and OwnerEmail. You could reference the trigger inputs directly inside the HTTP request action instead. Using variables here is just clearer to read and easier to debug when something goes wrong partway through:
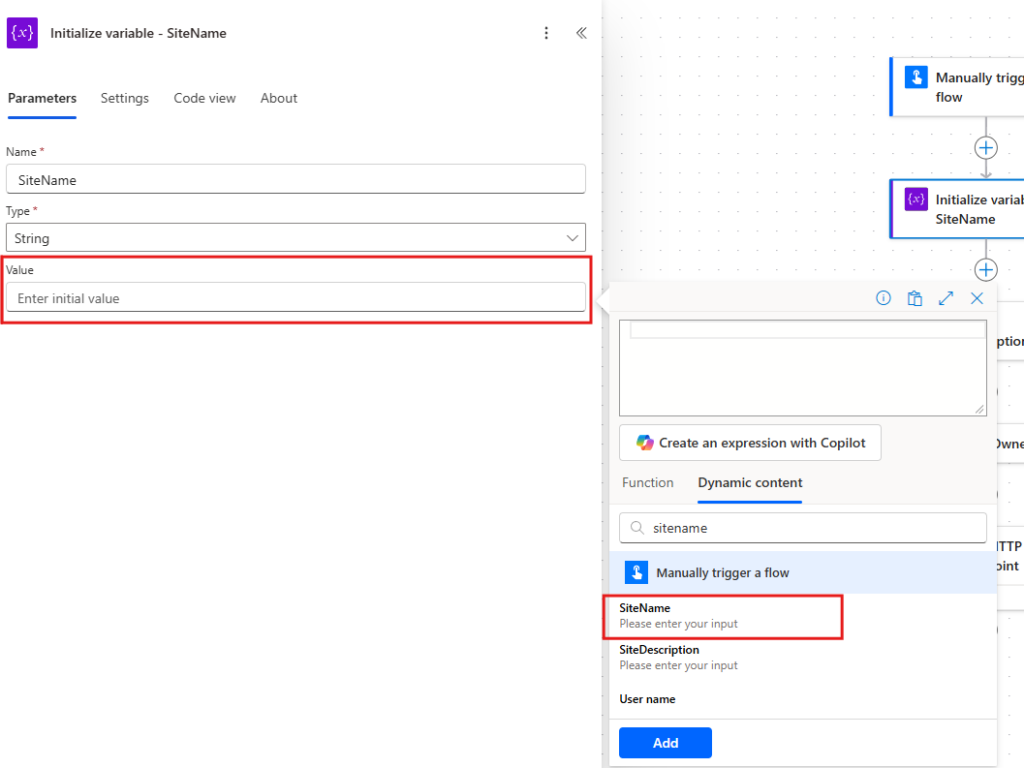
Assign each variable to its corresponding trigger input value:
Now add the Send an HTTP request to SharePoint action:
- Site Address: your root site address.
- Method:
POST - URI:
/_api/SPSiteManager/Create - Headers:
Accept: application/json;odata=verbose,Content-Type: application/json;odata=verbose
Body:
{
  "request": {
    "Title": "@{variables('SiteName')}",
    "Url": "https://yourtenant.sharepoint.com/sites/@{variables('SiteName')}",
    "Description": "@{variables('SiteDescription')}",
    "Lcid": 1033,
    "ShareByEmailEnabled": false,
    "WebTemplate": "STS#3",
    "Owner": "@{variables('OwnerEmail')}"
  }
}
Worth flagging directly: the property is Owner, not SiteOwner. An easy typo to carry over from an older example, and one that fails the request rather than silently ignoring it. Because this uses the “Send an HTTP request to SharePoint” action specifically (not a raw HTTP action), Power Automate handles the authentication and request digest for you. You don’t need to fetch or attach one manually, which is the main reason to use this action instead of a generic HTTP call.
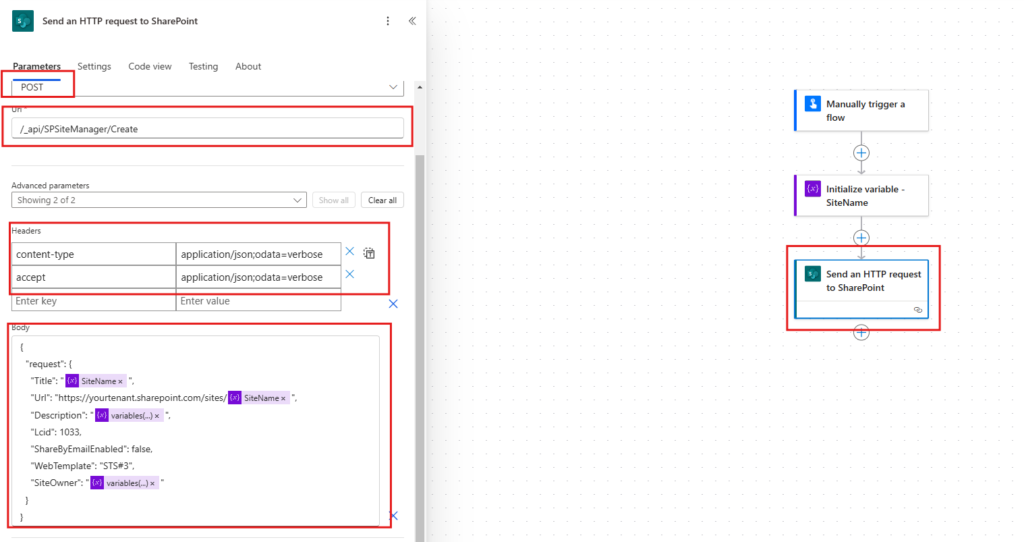
The property is Owner, not SiteOwner. An easy typo to carry over from an older example, and one that fails the request rather than silently ignoring it.
Testing the flow
Save and run it manually with test values:
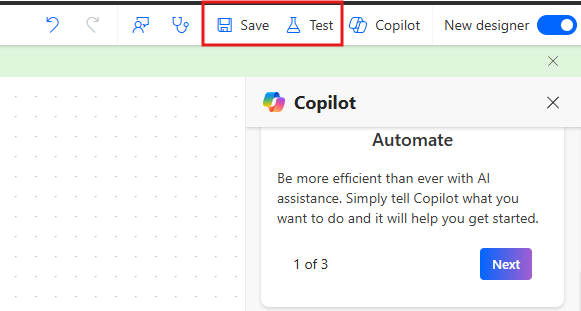
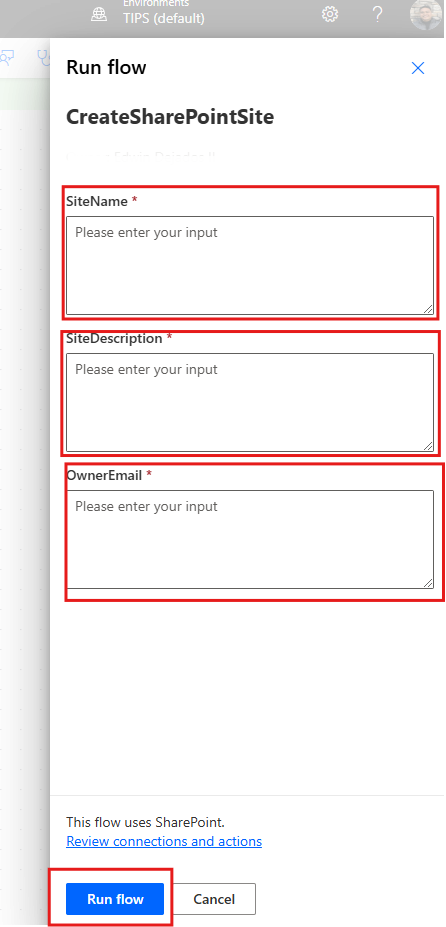
Check the flow’s run history to confirm it completed without errors, and confirm the site actually shows up at the URL you specified. The HTTP call can return success before the site is fully provisioned in rare cases, so a quick manual check is worth doing the first few times you run this.
Checking before you create
The walkthrough above assumes the site name typed in is always new. Once this flow is handed to other people to run themselves, that assumption breaks. Someone reuses a name, or runs the flow twice by accident, and SPSiteManager/Create doesn’t quietly do nothing or overwrite anything: it errors. Before firing the Create request, add a Send an HTTP request to SharePoint action calling the companion Status endpoint to check first:
- Method:
GET - URI:
/_api/SPSiteManager/status?url='@{encodeUriComponent(concat('https://yourtenant.sharepoint.com/sites/', variables('SiteName')))}'
The response includes a SiteStatus field with five possible values, worth knowing exactly rather than guessing: 0 = not found (safe to create), 1 = currently provisioning, 2 = ready/already exists and healthy, 3 = a previous provisioning attempt errored, 4 = the requested URL is already taken. Add a Condition action checking whether SiteStatus equals 0 before the Create action runs, and route anything else (2 or 4 especially) to a branch that notifies the requester the name’s taken, instead of letting the Create action fail with a raw HTTP error that means nothing to whoever’s running the flow.
Associating the new site with a hub
Worth adding as a follow-up step rather than a manual task left for later: a freshly created site starts unassociated with any hub, which means it won’t inherit shared navigation or branding until someone deliberately connects it. `SPSiteManager/Create` itself doesn’t take a hub parameter, so the association needs a separate call after the site finishes provisioning. Add another Send an HTTP request to SharePoint action, `POST` to `/_api/site/JoinHubSite(‘{hub-site-id}’)` (the hub’s GUID, quoted, as the single parameter), run against the newly created site’s own URL rather than the root site. Worth gating this behind the same `SiteStatus` check covered above (waiting for status `2`, fully provisioned) rather than firing it immediately after the Create call returns, since the join can fail if the site isn’t fully ready yet.
Best practices
- Define a naming convention before the flow goes live. Retrofitting consistent names onto sites created ad-hoc is much harder than starting consistent.
- Document the flow’s purpose and parameters somewhere other than your own memory, for whoever maintains it later.
- Add error handling (a Configure Run After branch on the HTTP action) so a failed creation notifies someone instead of failing silently.
- Test with real sample data before handing the flow to non-technical users to run.
When would you actually use this?
- Project sites need to be created the same way every time (same template, same naming pattern) whenever a new project starts. This replaces a manual checklist with a form.
- Onboarding needs a dedicated site created automatically as part of a larger new-hire flow, rather than someone remembering to set one up.
- You want site creation gated behind an approval step: pair this action with an approval flow so sites only get created after a manager signs off.
Related reading
- Choosing the Right SharePoint Online Site Type. Worth deciding before this flow runs, since
WebTemplatein the request body locks in the site type. - How to Copy Files from One Site to Another Using Power Automate. A natural next step once a site’s been created, if it needs seeded with starter content.
That’s the full flow, screenshots included. Questions about adapting this to your setup? Comment below.
App Catalog Archives Authentication Automation Backup Compliance Content Type CSS Google GULP Javascript Limitations List Metadata MFA Microsoft Migration Node NodeJs O365 OneDrive Permissions PnP Policy PowerApps Power Automate PowerAutomate PowerFx PowerPlatform PowerShell Rest Endpoint Security Send an HTTP Request to SharePoint SharePoint SharePoint List SharePoint Modern SharePoint Online SPFX SPO Sync Tags Teams Termstore Versioning Workflows