

In this post: What is a list or library view? · How to create a view · Edit a view · List View Settings · Setting a view as the default · Related reading
What is a list or library view?
SharePoint List and Library Views are used to show your list items or library files in an organized way, based on how you want users to see them or interact with them. You can select which columns you want to display, add filters, sort items, and group them. There are two types of view you can make, a Private View and a Public View. Only the user who created a Private View can see it. A Public View is visible to everyone who has permission on the list.
How to create a view
When you create a list, there is a default public view named All Items. You can either save the default view as a new view or create a new one.
Create new view
If you want to create a new view without using an existing view, use the Create new view button. Click View Options on the right side of the list’s command bar.
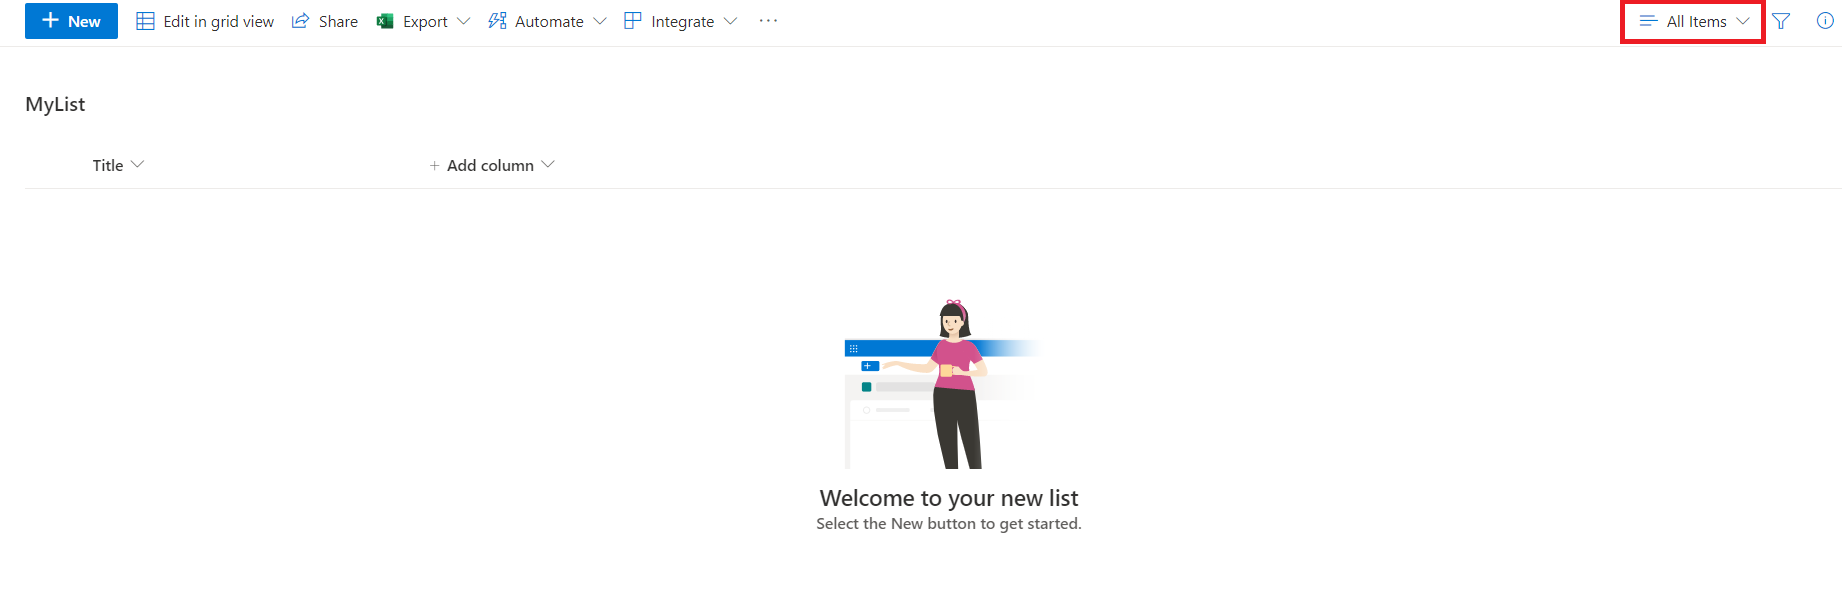
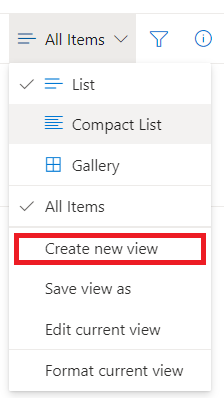
Click the Create new view button. Then enter the View name.
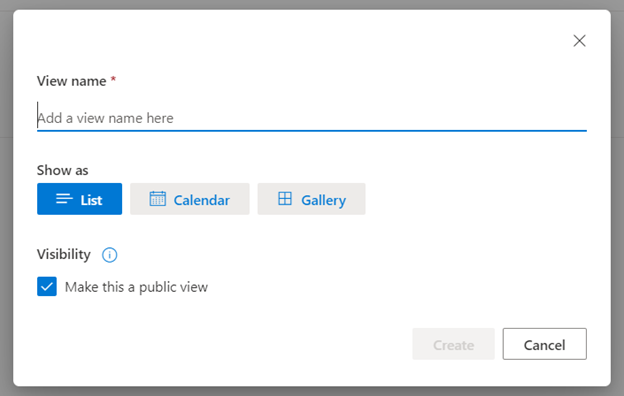
As you can see, there are different kinds of views that you can create. The options are List, Calendar, and Gallery.
- List: shows all the items in a list manner. You can choose the columns you want to display.
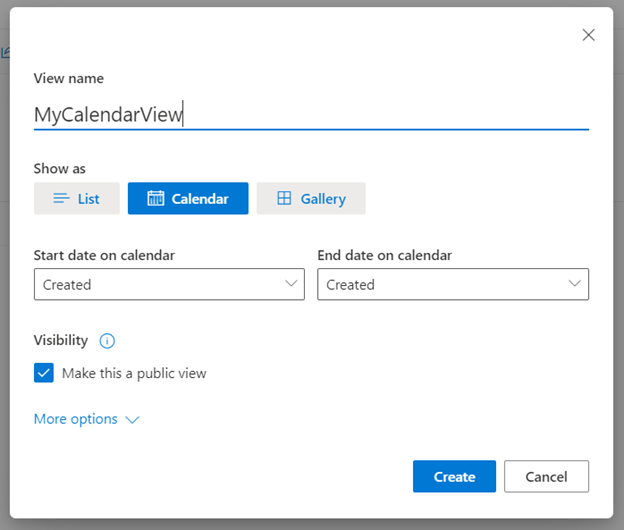
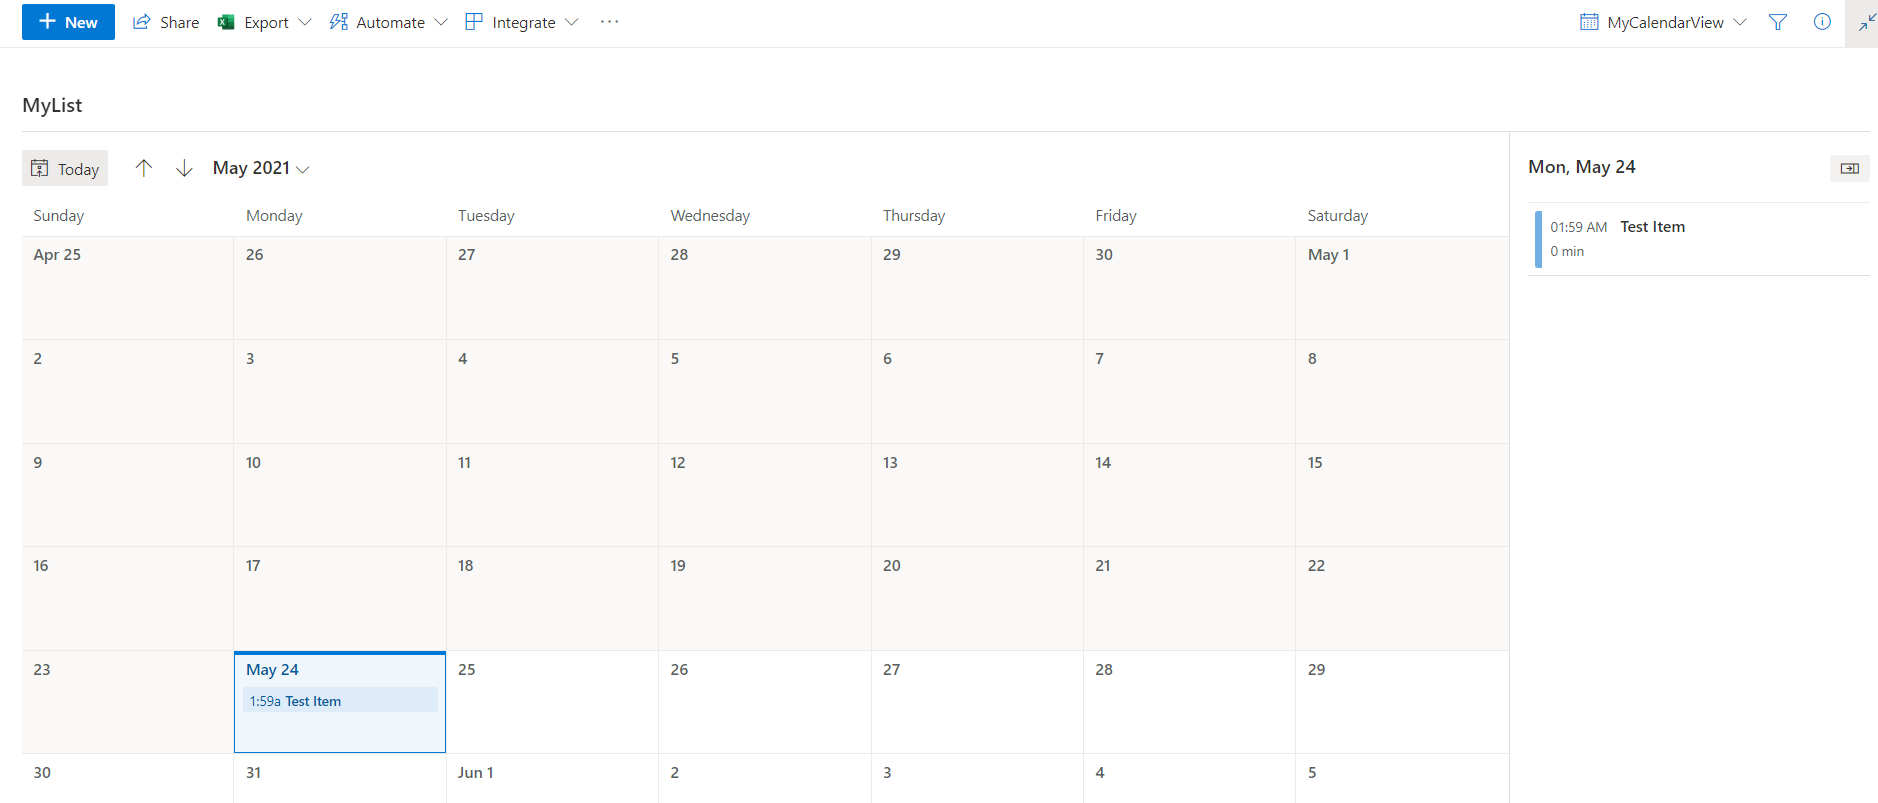
- Calendar: shows the items in a calendar view. On this view, the only columns displayed are the Title, the start date, and the end date.
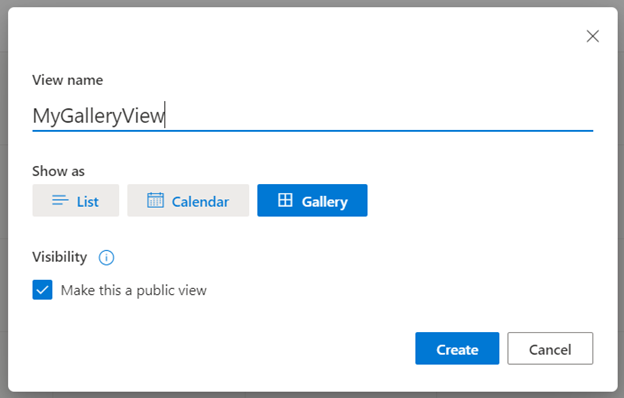
- Gallery: shows the items in a gallery view. You can select the columns you want on the item’s cards.
Show as List
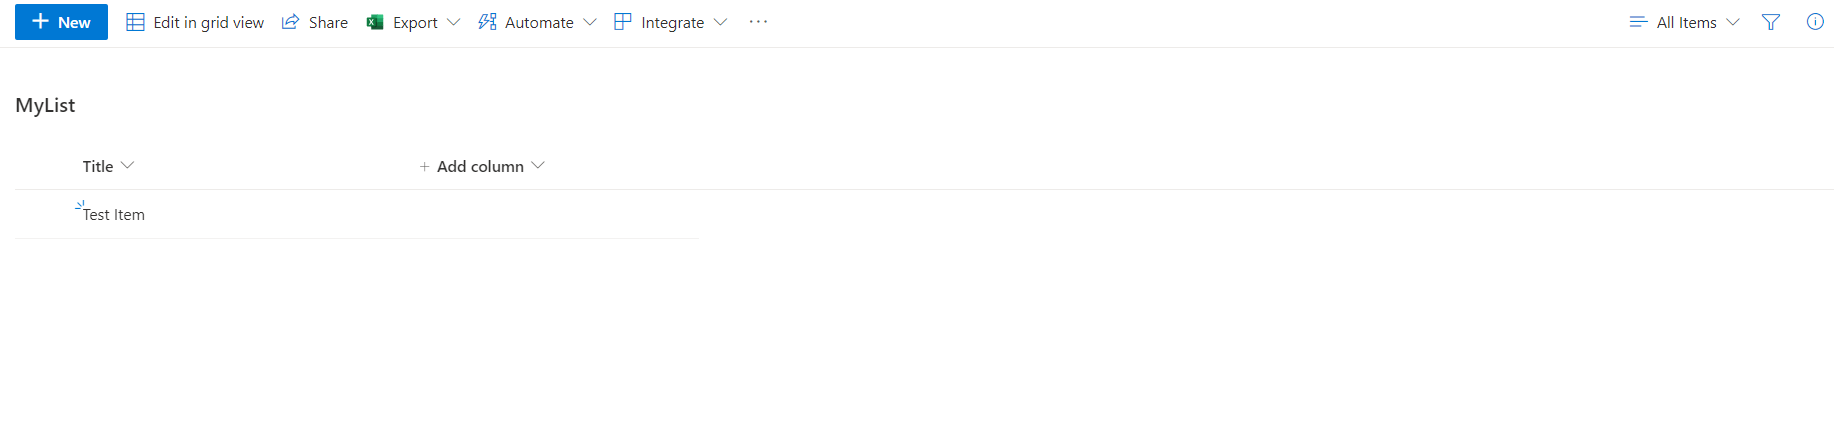
Create new view and select the option List on the Show as choices. Click the Create button.
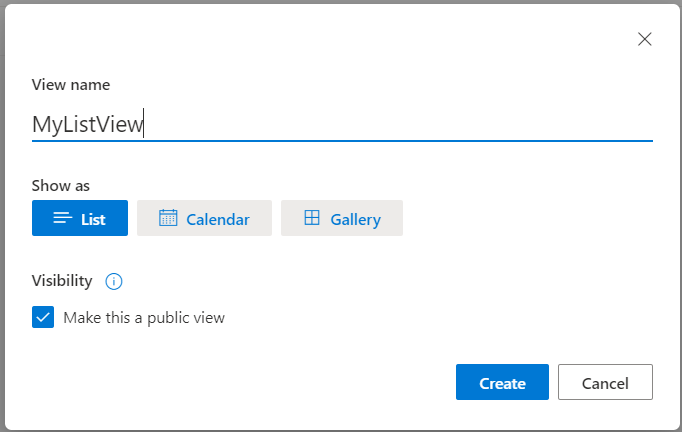
Below is an example of a List view.
Show as Calendar
Create new view and select the option Calendar on the Show as choices. Select the columns you will use as start and end dates in the dropdown fields Start date on calendar and End date on calendar. You can choose any column as long as it’s a Date Time metadata field. Then click the Create button.
Below is an example of a Calendar view.
Show as Gallery
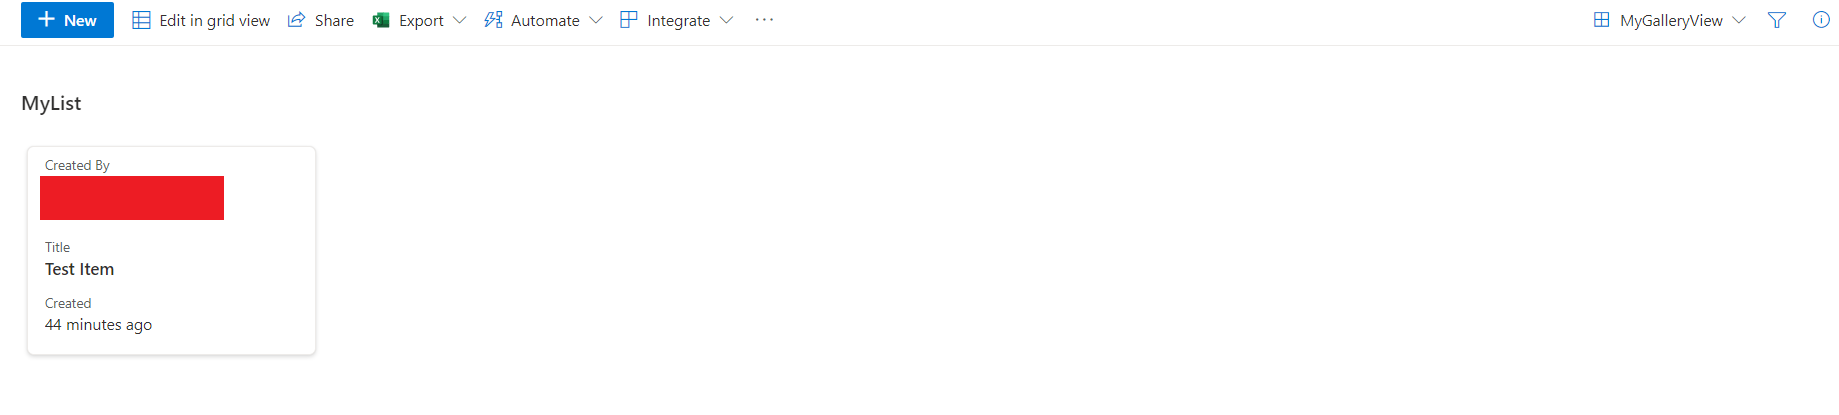
Create new view and select the option Gallery on the Show as choices. Click the Create button.
Below is an example of a Gallery view. As you can see, it shows the items as cards.
Save view as
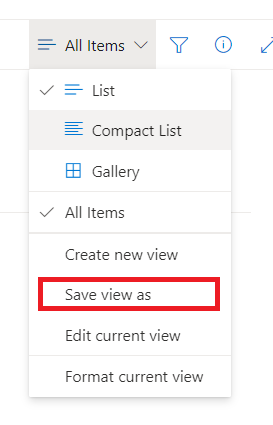
To save a view as a new view, click View Options on the right side of the list’s command bar. Then click Save View As.
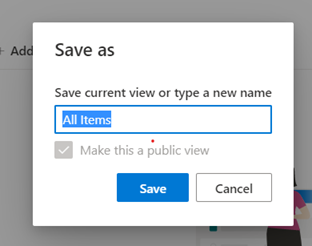
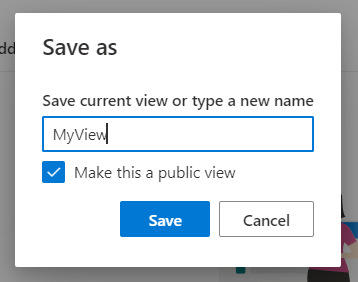
Next, change the view name to the new view name. Check the checkbox Make This a Public View to make it a public view, and uncheck the checkbox to make it a private view. Then click Save. The new view is now available.
Edit a view
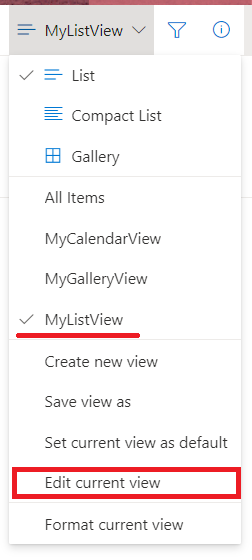
You can also update a view if you have permissions. Open the view that you’ll be updating. Click the View Options menu and click Edit current view.
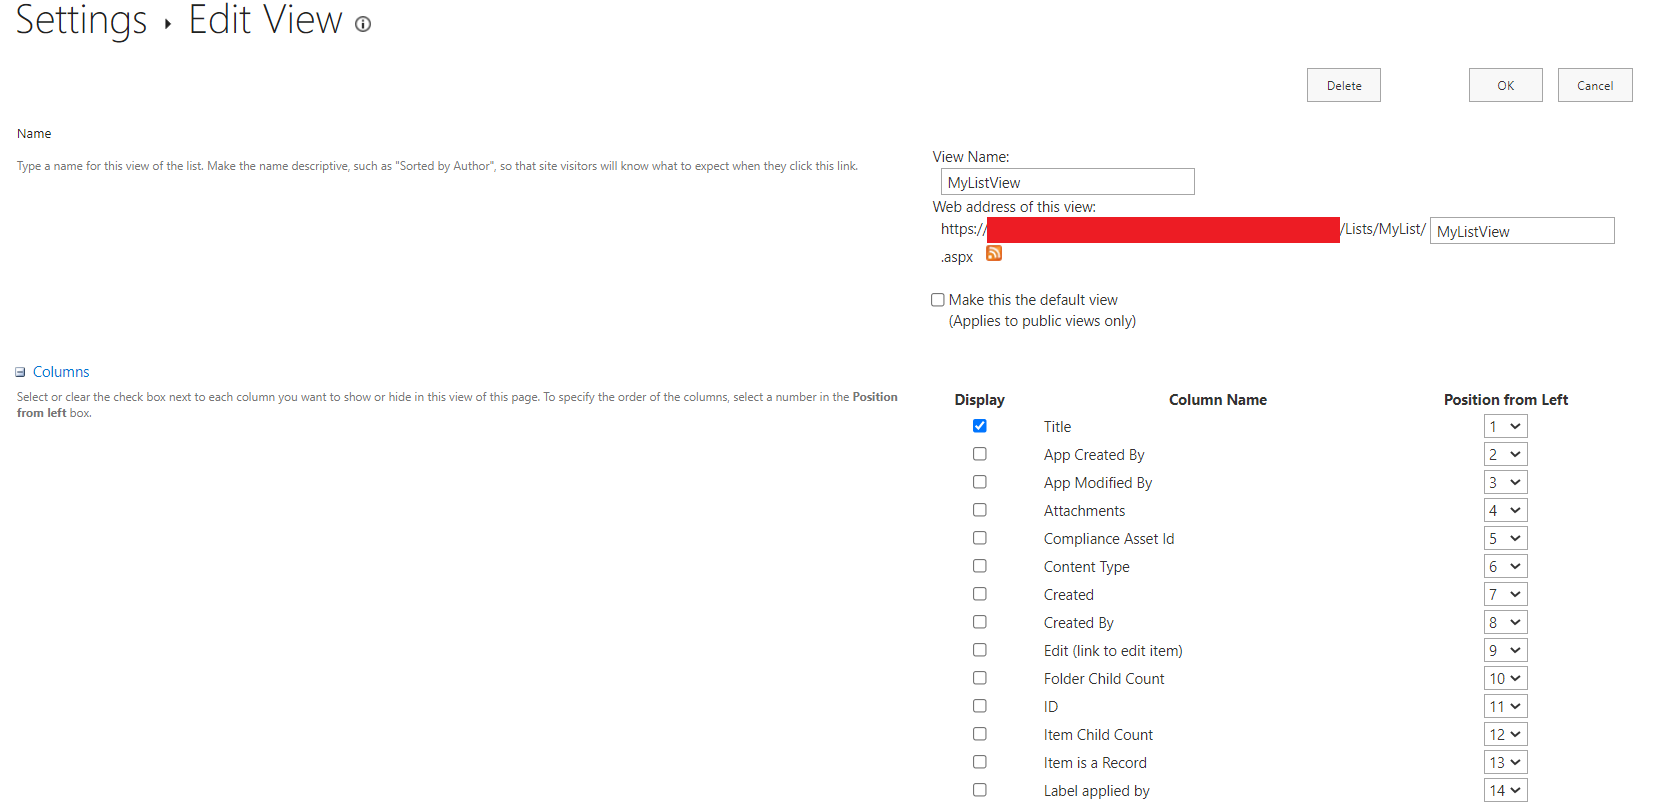
You will be redirected to this page. Update the view settings then click the OK button.
List View Settings
You can always update the settings of a view based on your preference. To set up the view, select it in View Options, then click Edit Current View. You’ll be redirected to the Edit View page. Here are the settings available:
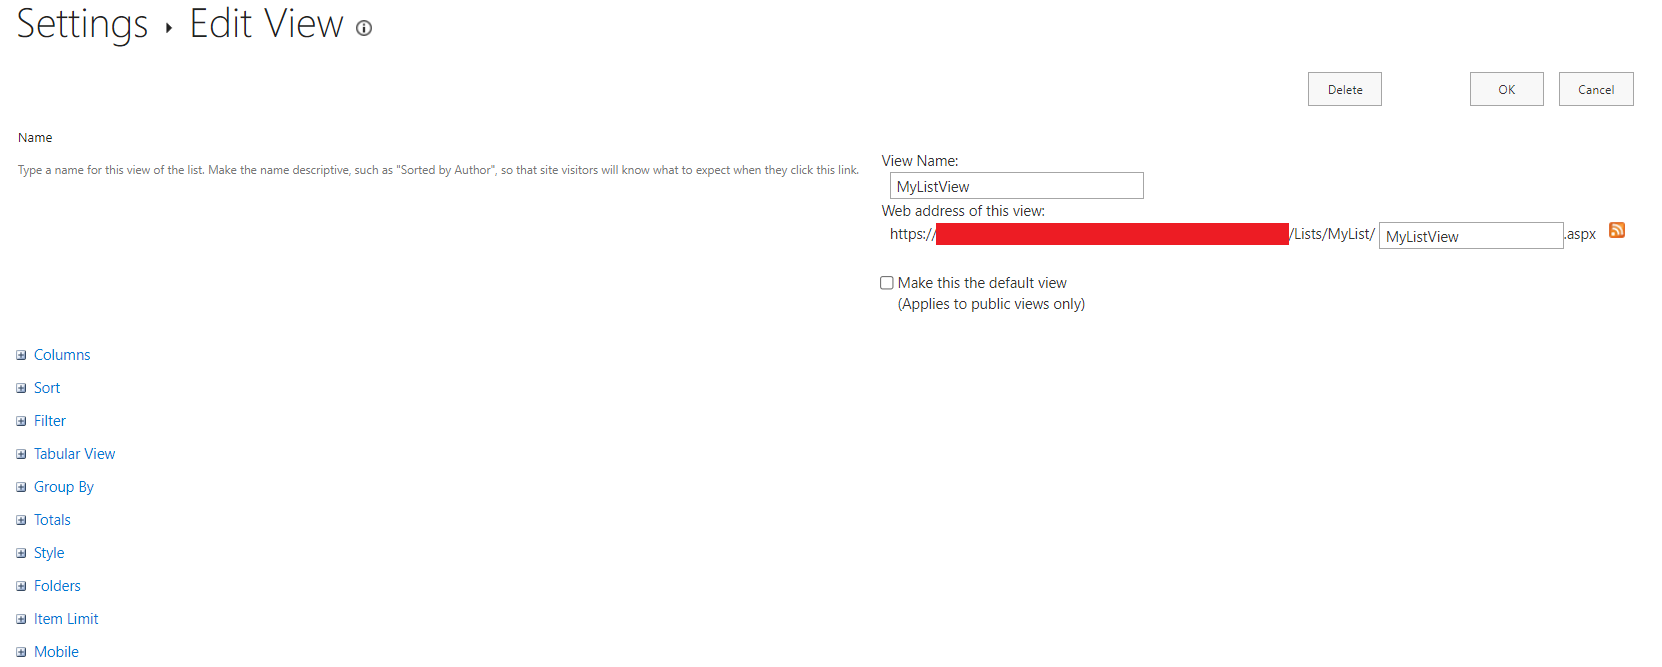
Name
Here you can update the view’s display name and the link to the view.

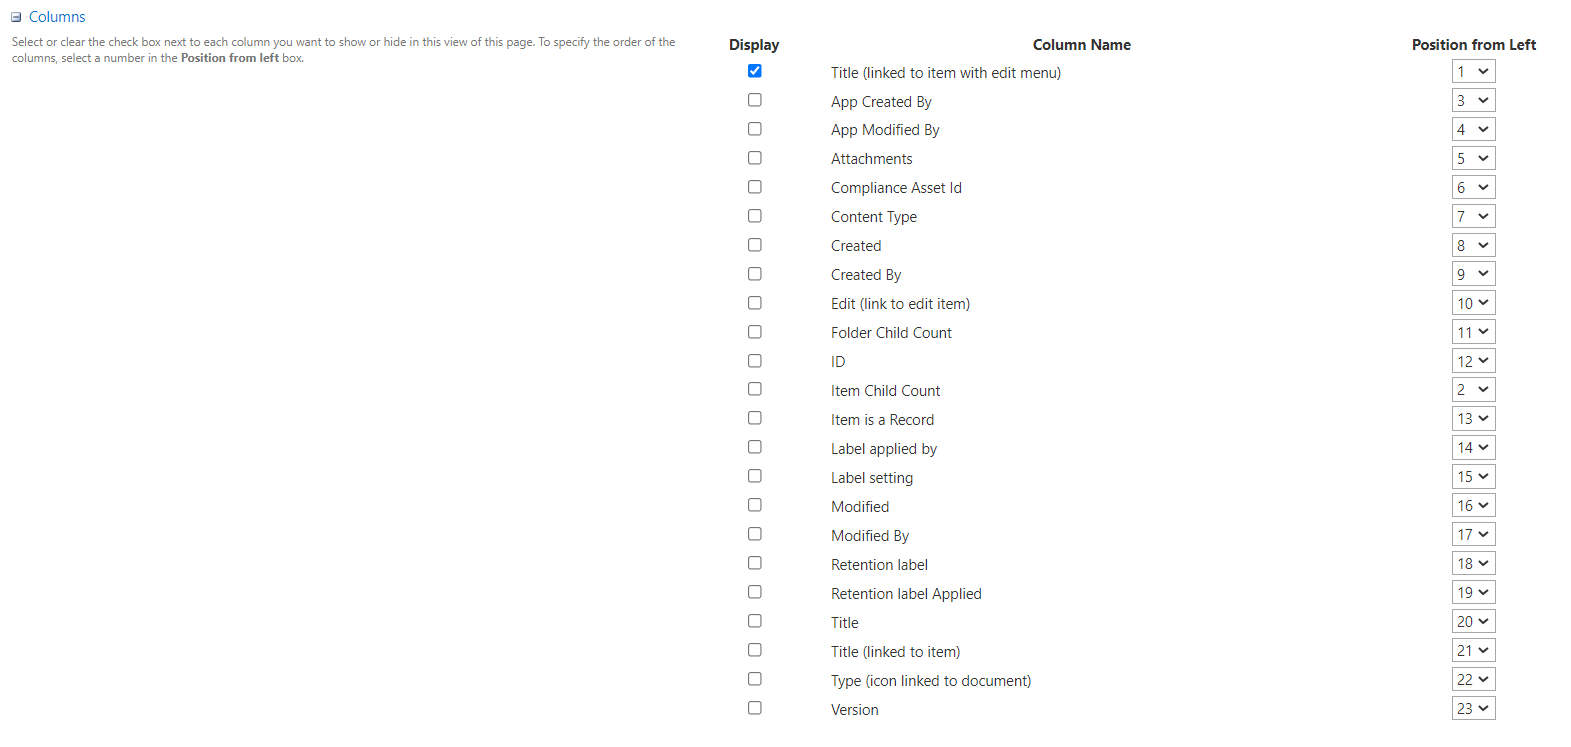
Columns
This shows all the available columns you can display on the view, along with column-sequence options.
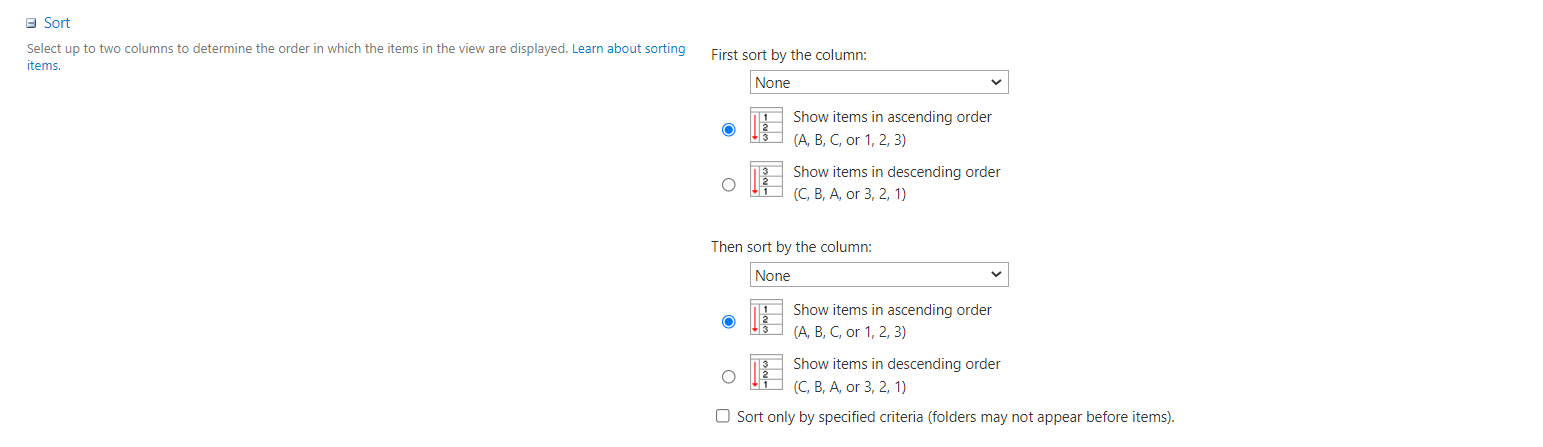
Sort
This is where you sort all the displayed items. Note that only two columns can be used to sort the records.
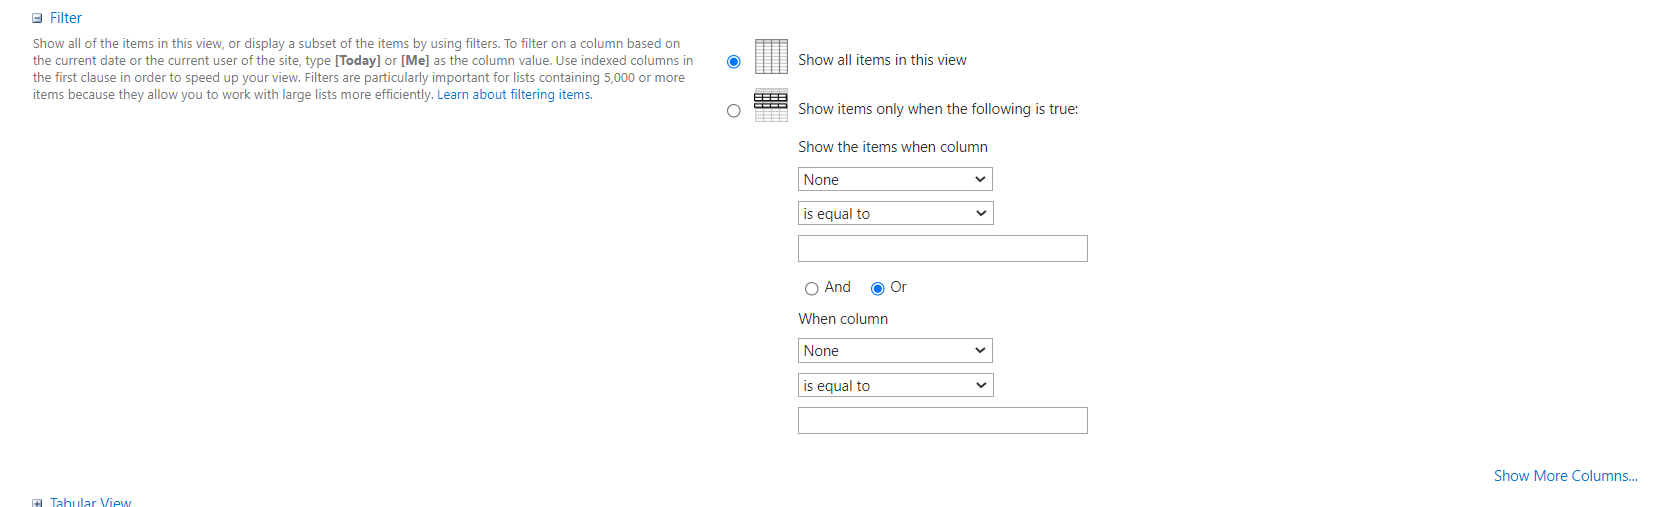
Filter
You can filter which items to show based on the columns. Compared to Sort, Filter lets you add more conditions and columns.
Tabular View
This setting lets you choose whether to show checkboxes for each item.

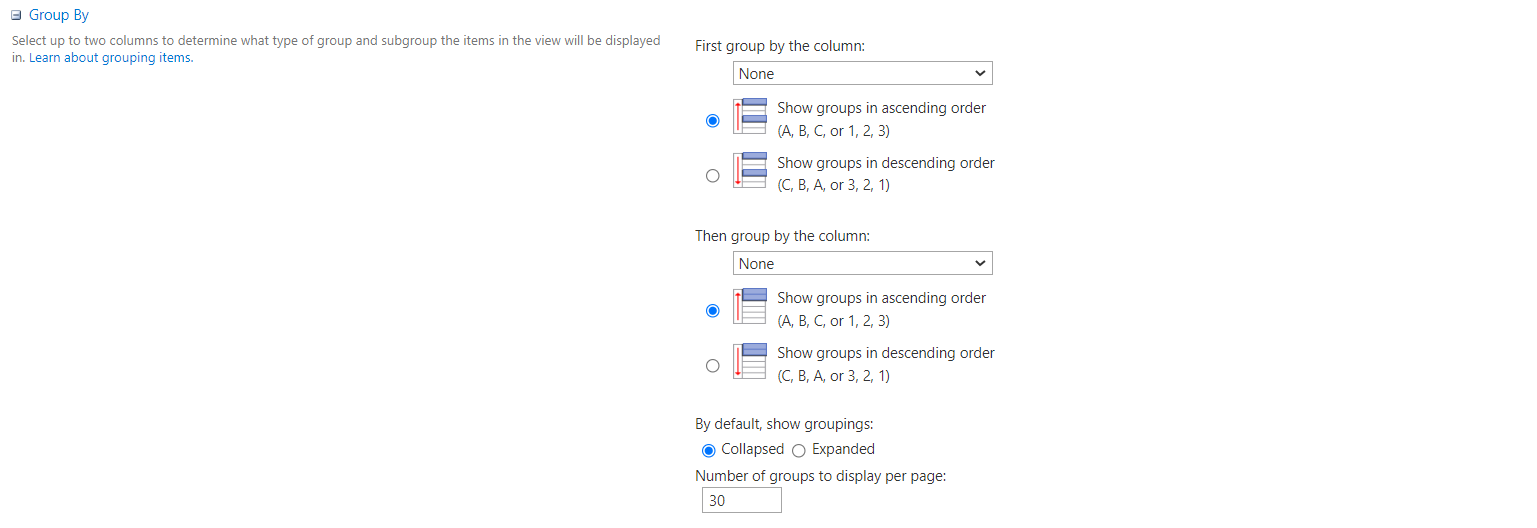
Group by
Same as Sort, you can only use 2 columns to group items. You can set whether grouped items are collapsed or expanded by default, and how many groups display per page.
Totals
This setting lets you show totals on items. Available totals functions are Count, Average, Maximum, Minimum, Sum, Std Deviation, and Variance.
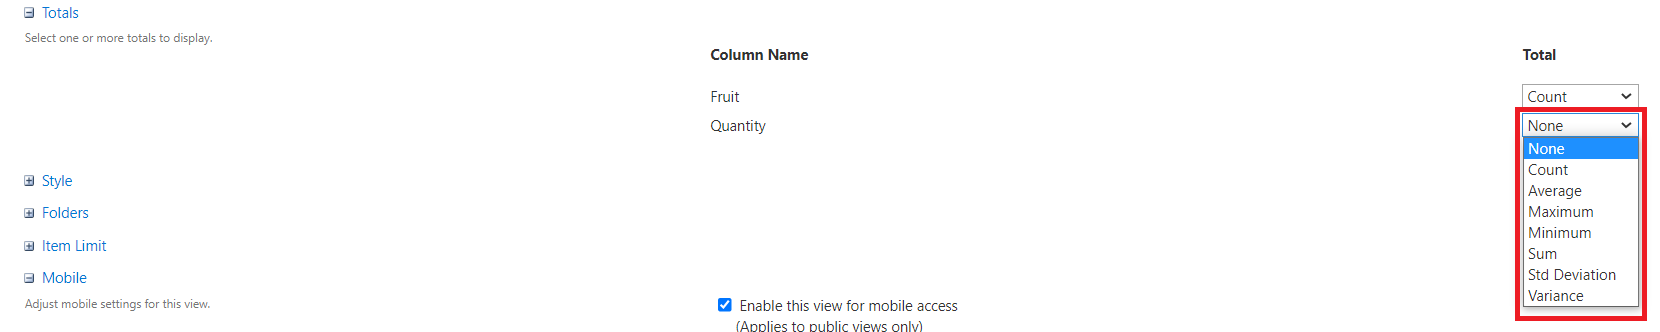
Here’s an example view that uses Totals:
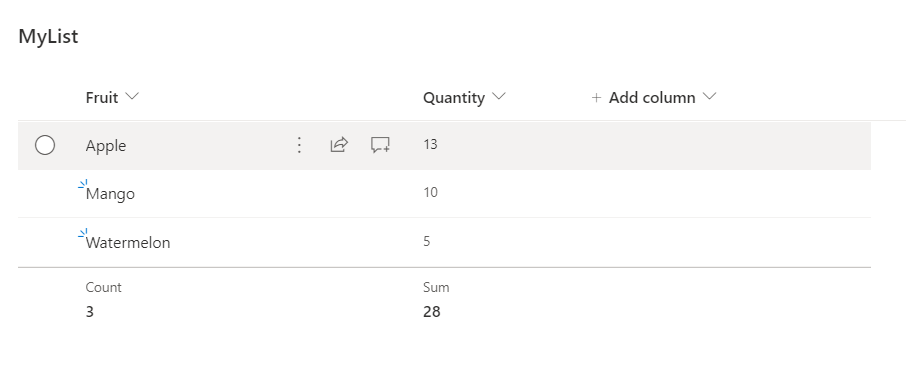
We can see it counted the number of fruits on the list and calculated the total quantity of all the fruits.
Style
There are eight different styles you can use to display your view. Check out the styles below:

Folders
Folders lets you show items with or without their folders.

Item Limit
This lets you limit the number of items shown per page.

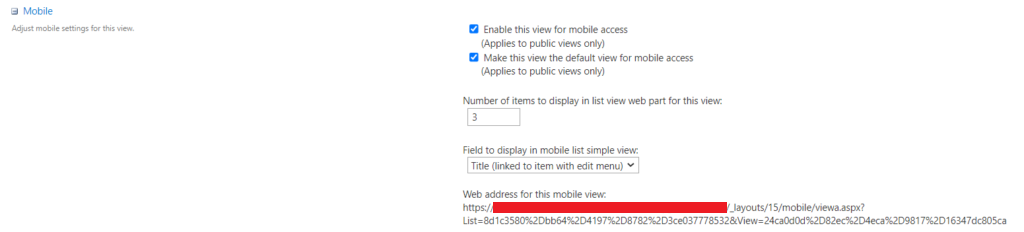
Mobile
This setting is for the mobile view. You can enable or disable the view for mobile, make it the default view for mobile only, and limit the number of items to display.
Setting a view as the default
Everything above covers creating and configuring a view, but not the one setting that decides whether anyone besides its creator ever actually lands on it: which view is the default. A public view someone builds with a better Filter/Group by/Style combination than “All Items” doesn’t automatically become what other users see when they open the list. It has to be explicitly made the default. Through the modern list view: open View Options, select the view, and use Set current view as default. Through classic List Settings: List Settings > Views, open the view, and check Make this the default view.
Worth knowing before assuming this is purely cosmetic: the default view is also what most out-of-the-box list web parts and some third-party tools fall back to when no specific view is otherwise requested, so changing it can have downstream effects beyond “what people see when they click the list link”, worth a quick check of anywhere the list is embedded before swapping the default on a heavily-used list.
A better view doesn’t help anyone until it’s actually set as the default. Otherwise everyone still lands on All Items.
Related reading
- SharePoint List View Formatting Overview. JSON-based visual formatting layered on top of the views covered here (colors, icons, conditional styling).
- Understanding SharePoint List Types. Background on what’s actually being viewed, before you start configuring how it’s displayed.
There’s a lot you can do with the out-of-the-box functionality. Play around with List View Settings to get familiar with it. If you have questions on how to display your items in a view, leave a comment below and we’ll answer right away.
Have a nice day!
App Catalog Archives Authentication Automation Backup Compliance Content Type CSS Dataverse Google Governance GULP Javascript Limitations List Metadata MFA Microsoft Migration Node NodeJs O365 OneDrive Permissions PnP Policy PowerApps Power Automate PowerAutomate PowerPlatform PowerShell Rest Endpoint Security Send an HTTP Request to SharePoint SharePoint SharePoint List SharePoint Modern SharePoint Online SPFX SPO Sync Teams Termstore Versioning Workflows
Thanks for the tips about the calendar view! Really appreciate contents like this!